Some Basics of CW Hardware

It seems like hams assume a lot with terminology/jargon. One point of confusion for me was what exactly the parts were for even a simple CW practice setup would be. The words I kept seeing were key, paddle, iambic, keyer and oscillator. Here is what I finally concluded (though my conclusions may not be 100% accurate).

There is an excellent article (as with so many topics) on Wikipedia titled Telegraph Key. It covers the straight key, bug, and iambic key.

I’ll start with the simplest which is just a straight key. In this case, the key is just a simple switch that closes and opens the circuit. When the circuit is closed, you are sending, then it’s open, you’re not. That makes the dits and dahs. With a straight key, the user controls the length of the dits, dahs and spacing. Convention is that the dah is equal in length to three dits with a dit spacing between letters. That’s a lot of to deal with especially when you’re just learning. Plus modern hams seem to hate it when people get on the air with a straight key. They’re slow and hard to copy.

I’m still not entirely sure what a bug is, but they don’t seem terribly popular so I didn’t really look into them. It seems to be a mechanical paddle key that performs some of the same functions as an electronic keyer. Like I said though, unless you’re into the nostalgia and evolution of CW, you can probably skip the bug.

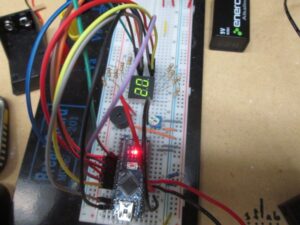
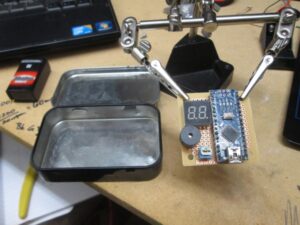
Next up is the paddle. This is where it starts to get fun and nerdy. I haven’t seen a lot of these since people seem to go straight to iambic keying when setting up an electronic keyer. So a single paddle, as with an iambic key, there are two switches and a common ground.  With a paddle, the paddle itself is the common ground and the operator moves it side to side to the dit and dah contacts. When one switch is closed, the keyer makes a dit, repeatedly, with proper spacing; when the other is closed, the keyer makes a dah. So, then, what is a keyer? A keyer is a little electronic device that actually generates the tone, tone length and spacing. Of course you can just search and find an already built keyer that does all kinds of stuff for you, but where’s the fun in that? There are wildly varying plans for them all over the internet, but unless you’re one of the lucky ones that lives in a town with something more than Radio Shack, you’ll have to order parts. And wait. I chose to make my keyer out of an Arduino Nano, some parts from Radio Shack and stuff I found. More on that in the Arduino CW Project series.

A step further is the iambic key. This key has 2 paddles, one for dit one for dah. There is a central contact that acts as the common ground and each paddle is a switch for the dit or dah. But with an iambic keyer, when you squeeze the two paddles together, it will alternate between dit and dah with proper spacing. This is really cool, but will take practice. For myself, I built an iambic key, but have not implemented the iambic functionality to the software on the Arduino based keyer. I’ve only just started learning morse code, so I’m learning with just the basic keying. Maybe this is counter productive, but I’d like to be able to use both a regular paddle and an iambic key.

If you have any questions or corrections for this article, please ask. Teaching and helping others is a great way to learn, and ham radio is a social hobby. Please refer to my Arduino CW Project series.

Arduino CW Project: part 1

Keyer Parts list:

  • Arduino Nano (or compatible)
  • Piezzo buzzer
  • 10K ohm trim potentiometer
  • 8x 100 ohm 1/4 watt resistors
  • 2-digit seven segment display (SSD)
  • 9 volt battery
  • 9 volt battery cap
  • 10x jumpers
  • 3.5mm audio jack
  • some extra solid wire for short connections

I was so excited when I got the Arduino Nano, I had the headers  soldered and on the breadboard for a CW keyer the same night I got it. I didn’t get the 2-digit seven segment display (SSD) installed until a couple days later. Now I’ve got that wired up and working as it should and with a more logical wiring layout than I did when I got it working before. This will be significant later.

I started with the tutorial and code for seven segment displays I found over at Tinker Hobby. With a little work and some judicious note taking, I was able to map my common anode SSD and get the counter program working right. From there, I needed to figure out how to output my WPM (Words Per Minute) to the SSD. You can easily use Serial.println() to output WPM to the debug window in the Arduino IDE, but that’s not very portable. To get your words per minute, you’ll need a little math (but not much really). You already have the millisecond length of the tone from the sketch. Just divide 1200 by the milliseconds and you’ve got your approximate workds per minute. A little tip here (and you’ll see this in the sketch) is to divide down the milliseconds so that the potentiometer adjustment isn’t so sensitive.

Okay. So now you have your WPM. How do we get it to the SSD? It’s not as hard as you’d think. We start by breaking up the digits of your WPM. We have to do this because the SSD doesn’t actually display both digits simultaneously. What’s really happening is that one digit gets displayed, then the other, really fast. So that’s what we’ll do. To separate the digits, we’ll use the modulo operator that performs a simple division and returns the remainder. You can see how this is done in the sketch. You may have to experiment a little to get how the pins are laid out on your SSD. The segments are always the same. You can change the mapping in the definitions section of the sketch.

Now you just follow the schematic, write the sketch to the Arduino and you should have a working, adjustable keyer with side tone and a handy readout.

Nano with everything wired up for testing.

Nano with everything wired up for testing.

You can see the Arduino Nano at the bottom with the power LED lit up. I’m running the project off of a 9v battery on the VIN (Voltage IN) and ground. The wiring on the right side of the board — the analog pins — is for the keyer. A0 is set as input from from the 10k ohm trim pot, A1 is output to the piezo speaker for sidetone, and A2 and A3 are the dit and dah for the Hackey. The SSD is hooked up the the digital pins.


Back on 2m!

I finally finished my new 2 meter 5/8 wave whip antenna, tested it and installed it on my roof. I got the design from the 1986 ARRL Handbook. It’s a very simple design, but with everything else, it took me awhile to get everything together. The original design called for a 3/4″ x 3 1/2″ acrylic cylinder, but I wound up using a short length of 1/2″ PVC (approx. 3/4″ OD) with a screw on cap. Later it occurred to me that I could have used one of those acrylic toilet plunger handles. Maybe I’ll switch to that when I install it on my truck. For now, the PVC is working just fine, and I’m sure you could use pretty much anything close to the right diameter and is non-conductive.

I had some trouble understanding how to actually connect the antenna to my radio and how to mount it. The tap on the 4th coil is soldered to the point in the SO239, while the ground at the very bottom of the coil can just be screwed down to whatever you’re using for your ground plane. After some thought, I understood that that means the antenna assembly itself doesn’t have to affix to the ground plane. Mine is zip-tied to a 2×4 that is in turn zip-tied to the vent that my feed line feeds into. I’m not sure it’s totally necessary, but I also connected the outer part of the SO239 to ground. Whether or not it’s necessary, it doesn’t seem to hurt anything.

It performed well for both RX and TX during the initial test on my balcony, and I have now tested it in it’s semi-permanent home on the roof. It works great. The roof acts as a giant ground plane just as expected. The vent that it’s attached to comes into the back closet where my little ‘shack is which is absolutely perfect! I have leftover cable from a 20’ line!

2m whip

I apologize for the one terrible picture. I don’t know what I was thinking. I’ll update the picture when I install the 11m or 10m dipole.

Next up, 11m half wave dipole for and old CB radio that was my Dad’s. If the radio works, I want to modify the radio to 10m. It should be relatively simple since it’s a PLL (Phase Locked Loop) radio.

A Very Simple CW Key and Keyer

So I finally got around to building a very simple CW practice setup. Initially, after a little window shopping for keys and keyers, and being frustrated with the prices I saw, I thought there had to be something cheaper. I became determined to wade through the sometimes confusion terminology, figure out what exactly I needed and make it. What I found was that making a paddle or key is so simple it’s almost disappointing, but it turned out to be super exciting nonetheless. I found “plans” for what the maker was calling The Hackey, which is a simple 3-wire iambic key that uses an old hacksaw blade for the dit and dah switches. Pretty brilliant, simple and cheap. So I started collecting parts as I’d find them. I finally got the parts for the paddle together… now what? For a paddle or iambic key to work, you have to have a keyer. This is a point that I had some trouble with initially.

The key and keyer are separate devices. A key can refer to a straight key, paddle or iambic key. With a straight key, the user controls the dit and dah length, letter spacing, word spacing, everything. This can be very difficult for a beginner to learn to send clear code especially at a reasonable speed. For a paddle or iambic key to work, you need an electronic keyer and generates the dit and dah tones automatically for you. This is not to say that it will generate code for you. It just generates the dits and dahs at the correct length and spacing. A keyer for a paddle will just generate a dit or dah repeatedly, with the correct spacing, while you hold that the paddle to that side. A paddle key is such that the paddle is ground and the two contacts are dit or dah. A paddles and greatly increase the speed and accuracy of your code. An iambic keyer has two “paddles” with a center contact, such that the center is ground and the each paddles is dit or dah. The iambic key will generate a dit with one side or dah or alternating dits and dahs of the paddles are squeezed to the center contact. This method can be used to send fast code with minimal physical input.

Much of this is probably over-simplified. I’ll expand on this post as I learn more about keys and keyers.

Starting CW

As the stated purpose of my blog is low-cost/homebrew, I’ve found that a lot of simple and cheap projects are expressly for CW. Voice is a lot more complex for homebrew. So, I’ve had growing interest in learning morse code, but I haven’t found a good training program for Linux. Aldo seg faults. GtkMMorse seems like it may be good, but I didn’t feel like it was as clear as it could be. I was reading the article A Dialogue with a Reader from KB6NU’s Ham Radio Blog and his reader mentioned LCWO.net as his resource for learning CW. This was the aha! moment that I needed.

LCWO.net a very configurable web app that allows you to adjust not only the keying speed, but also the spacing. This is very helpful for a beginner. It can be difficult to here the separation between characters at first, and, at least with me, there is a delay in my recall of the letter. This pause compensates for that delay so I don’t miss letters and start to freak out and miss more letters.

On my Android devices, I use an app call Morse Mentor. It is free and a lot of the same features as LCWO, but I can use it on the go with or without Internet access.


Progress on Several Projects

As with everything in my life so far, I have trouble focusing on a single project. Radio should be no different. I’m currently trying to get my 2m mobile Yaesu back on the air, build a practice CW setup and figure out SDR on my DVB-T dongle.

The Yaesu just needs an antenna outside. I recently moved into a metal building that acts as an excellent RF shield. That means I have to get and antenna outside to get on the air really at all. As usual, I don’t have much money, so I turn to the Internet and making stuff out of found or cheap materials. I mostly completed my 5/8 wave 2m whip antenna tonight, but I haven’t had the chance to test it. And I haven’t really solved how I’m going to mount it on the roof. Hopefully I can test it soon and it will just work. The “coathanger” antenna I built before worked perfectly, so I’m hoping for the same luck with this one.

The paddles for the CW practice rig are almost built. I’ve finally gathered the parts I need, now I just need to assemble it. Then I get to build the practice keyer. I’m not sure how I really want to do this one. There are several plans for IC based oscillators/keyers that I’ve seen, but I’m leaning toward Arduino for several reasons. I think there are probably already some plans out there for Arduino, so that’s a good place to start. If not, it would be a good exercise for me to better understand the Arduino. It also seems like the Arduino keyer would be pretty easy to modify and improve. Plus I’m dying to make something useful out of the Adruino kit that I recently got. I know I’m pretty late to the party on that one, but at least I’m finally getting started. Better late than never, right?

And finally the SDR. I’m still in the very early screwing around stage. I know less about SDR than I do radio, and that’s really saying something. I did however pick up a faint transmission/conversation somewhere in the 2m band. Pretty amazing for using the crappy little 4″ antenna that came with the dongle and being inside of a big metal box. That seems like it will be a fun little thing to mess with on my little Acer laptop. The app GQRX-SDR was the ticket here. The latest version just detected my dongle and started working. I was tuning around in minutes. It’s built on the GnuRadio framework, but you don’t have to know much about SDR programming to start using it. I was even able to pick up several of the local FM radio stations. Pretty cool.

Anyway, time for bed. I’ve got Easter with the family tomorrow.

trial and error

It’s not trial and error, it’s trial and observation. Error implies a failure, but the only failure is when truly nothing is gained. An error, in this way, is when the unexpected happens as a result of the trial, but nothing is learned. If nothing was learned, the trial would never change. Or if it did, the change would be random, directionless. Observation, however, of an unexpected result, is learning. It affords educated change. It provides the direction necessary for further learning, discovery and development. Observation precedes evolution.